Log in to the Central Login Server
Introduction
This article outlines how to log in to the Central Login Server (login.srv.ualberta.ca), also known as the General Purpose Unix server (gpu.srv.ualberta.ca), which provides 24GB of storage space for holders of valid and active CCIDs. It is hosted on the Andrew File System (AFS). Many users use this server for Peoplesoft drop-boxes and to set up personal web pages.
Users will login either from a Mac with Terminal or from a current Windows PC with the built-in OpenSSH terminal app. Windows 7 legacy users will use the SSH functionality in the telnet client PuTTY.
[Note: current Windows users may also choose to use PuTTY]
The procedure below provides directions for all logins.
(Note: as of April 2023, AFS space is no longer available for alumni and new students.)
Applicability
This article is written for all users with a valid and active CCID wishing to access their file storage space on AFS.
(Note: as of April 2023, AFS space is no longer available for alumni and new students.)
Prerequisites
1. A valid and active University of Alberta Campus Computing ID (CCID). (Note: as of April 2023, AFS space is no longer available for alumni and new students.)
2. Access to Terminal (Mac) or a Windows command line, or via PuTTY
Procedure
Login from Mac OS
1. Open Terminal in Finder > Go > Applications > Utilities
[Note: You can also find Terminal by searching for it in the Mac Spotlight (⌘-Space)]
2. Type "ssh yourccid@gpu.srv.ualberta.ca and press Enter
[Note: Use your own CCID in place of "yourccid"]
3. If prompted that the server host key is not cached, type yes and press Enter
4. When prompted for a password, use your own CCID password and press Enter
Login with PuTTY
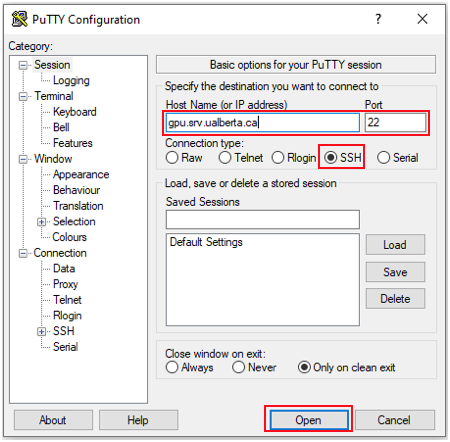
1. Open PuTTY from the Windows Start menu
2. When the interface opens, add the server name gpu.srv.ualberta.ca
3. Add the port 22
4. Choose protocol SSH
5. Click Open
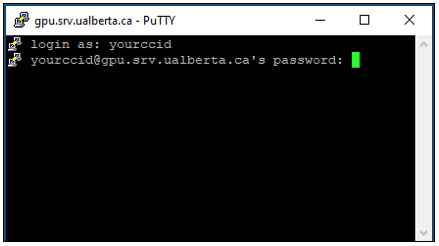
5. A command prompt black window will appear. Type your CCID, and press Enter, then type your password and press Enter:
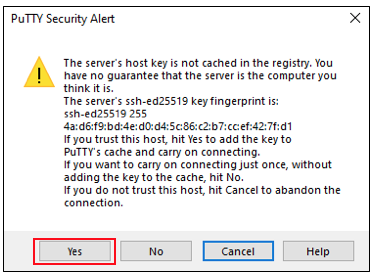
6. If prompted that the server host key is not cached, click Yes
Login from Windows with OpenSSH
Verify whether OpenSSH is installed in Windows:
1. Right-click on the Start Menu
2. Choose Settings
3. Choose Apps
4. Click on Optional features

5. Scroll down to OpenSSH, and expand the item
If Windows indicates that you may "Uninstall" OpenSSH, it is already installed. Otherwise, click to install it
When you are sure you have OpenSSH installed:
1. Open a Run dialog by pressing the key combination WindowsKey+R
2. Type cmd, and click OK
3. At the command prompt, type ssh yourccid@gpu.srv.ualberta.ca and press Enter
[Note: Use your own CCID in place of "yourccid"]
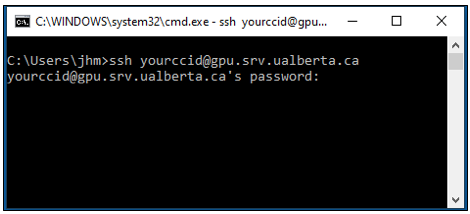
4. If prompted that the server host key is not cached, type yes and press Enter
5. When prompted for a password, use your own CCID password and press Enter